Manage appointments and reminders
· 5 steps · 4 min read
When Book appointments is turned on, your chatbot offers free times and saves each booking as a request for you to confirm.
Step 1
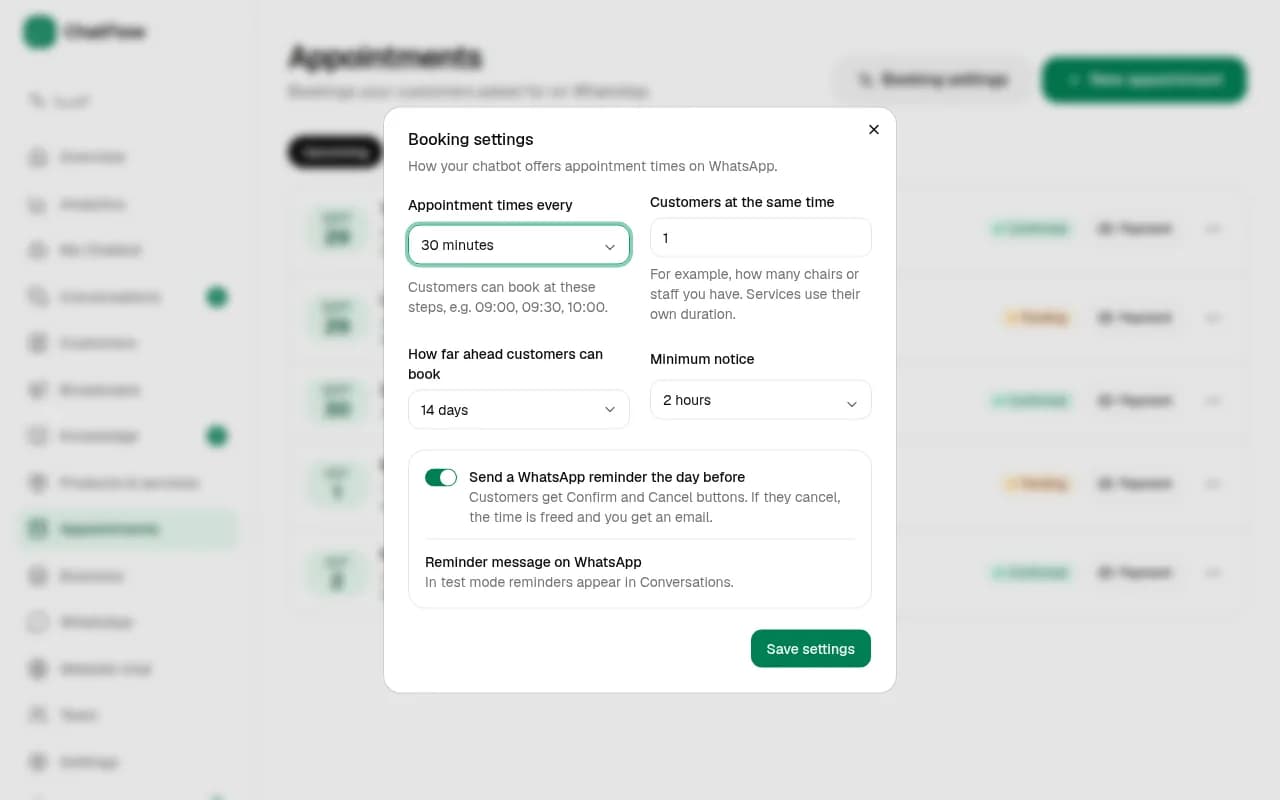
Set your booking rules
In Appointments, choose Booking settings. Set how often appointments start, how many customers you can see at the same time, how far ahead people can book and the minimum notice. Turn on the WhatsApp reminder the day before.
Step 2
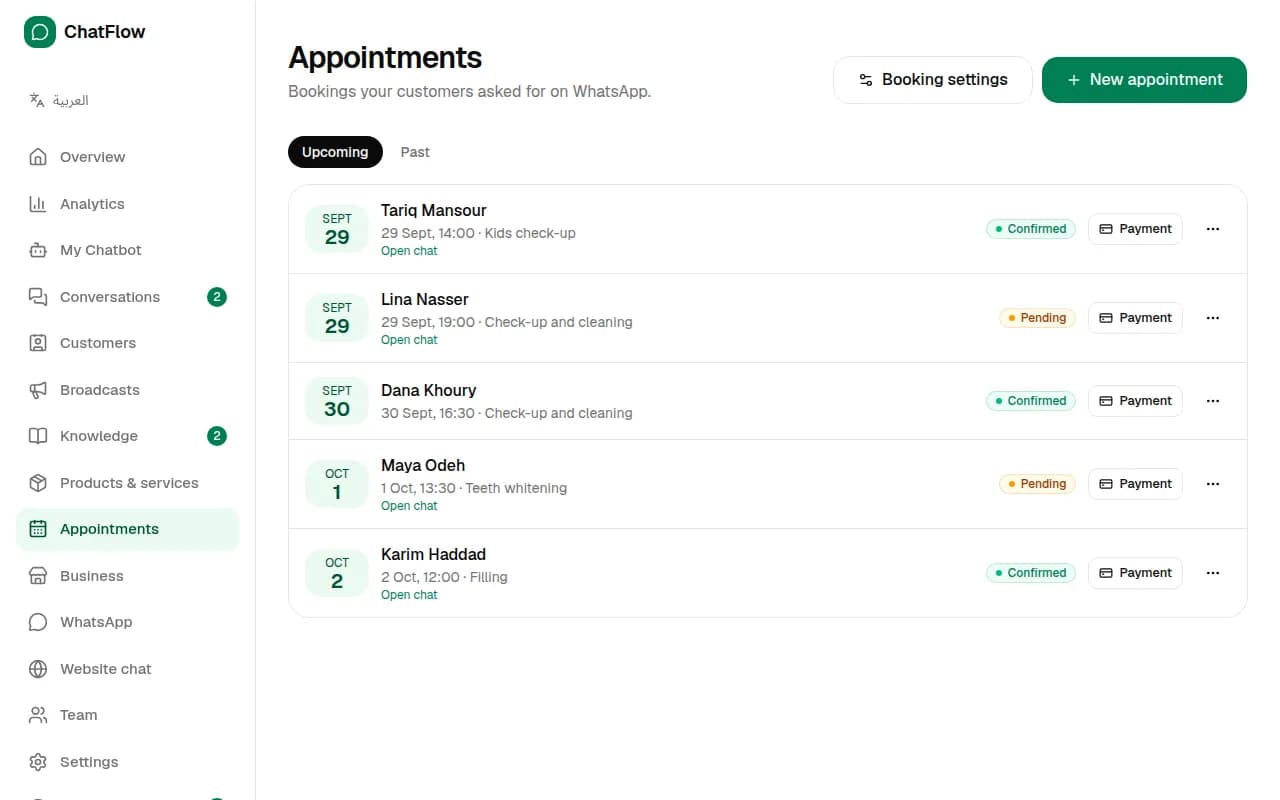
See your bookings
Upcoming shows every booking with the customer, time and service. New requests from the chatbot are Pending. Choose Open chat to see the conversation.
Step 3
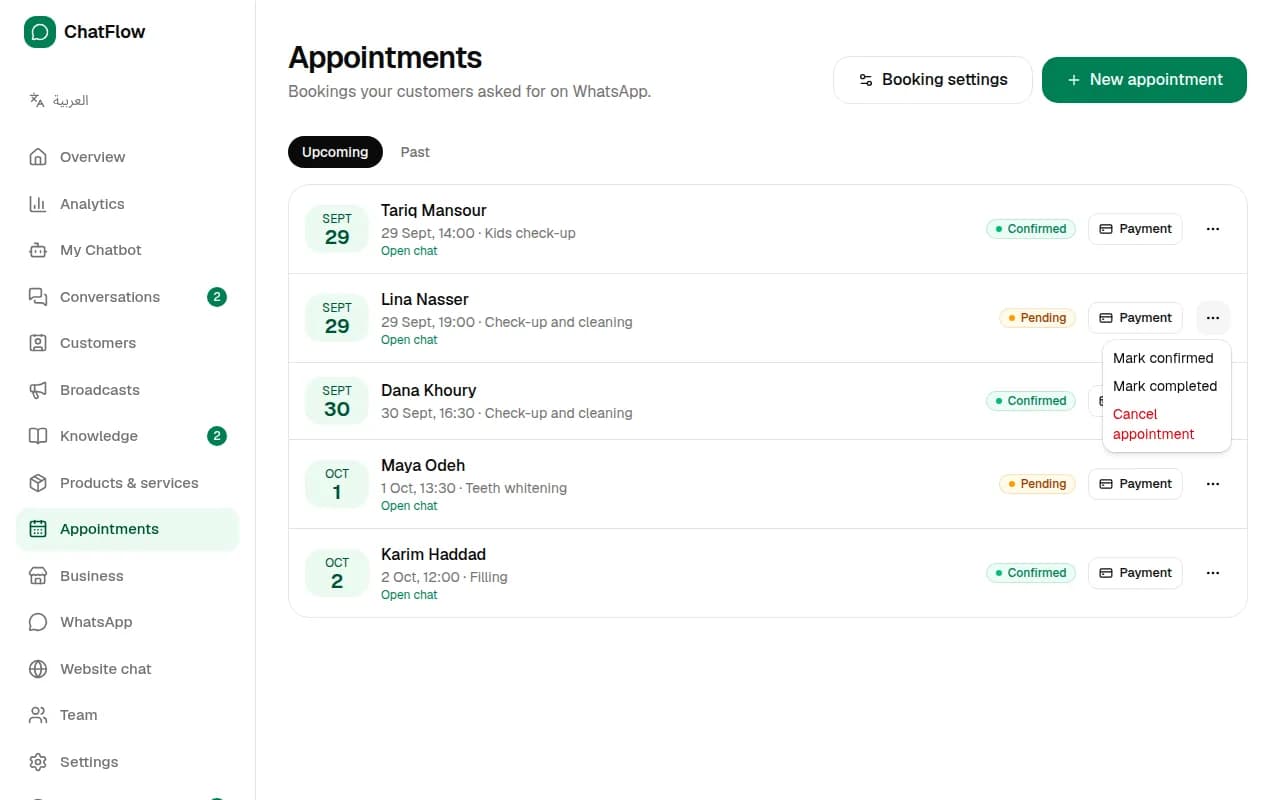
Confirm or cancel
Choose ⋯ next to a booking, then Mark confirmed, Mark completed or Cancel appointment. The customer gets a WhatsApp message when you confirm or cancel.
Step 4
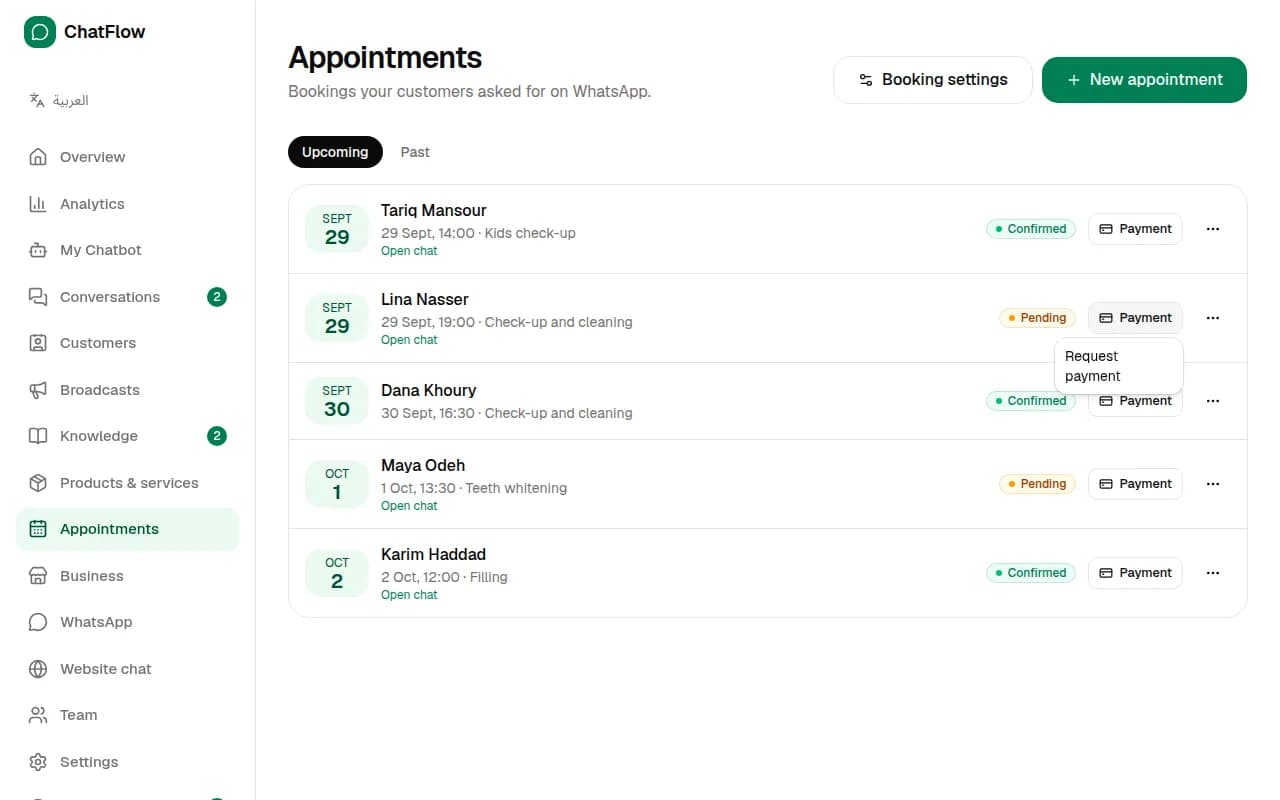
Ask for a deposit
Choose Payment → Request payment to send the customer a payment link for a deposit. Set up your payment link first in Settings → Payments.
Step 5
Reminders
With reminders on, customers get a WhatsApp message the day before with Confirm and Cancel buttons. If they cancel, the time is freed and you get an email. You can also add bookings yourself with New appointment.
Still stuck?
Open a ticket from Support in your dashboard, or write to us. We usually reply within one working day.
Ready to try it?
Create your AI WhatsApp chatbot in minutes. Free plan, no credit card.
Try Chatbot Free